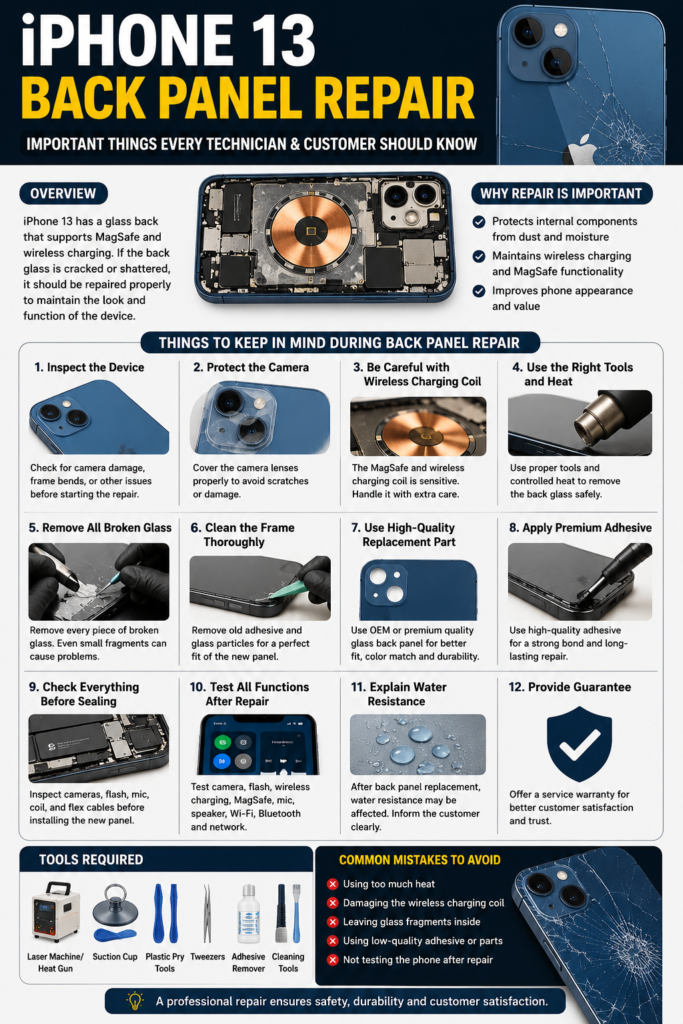
iPhone 13 Back Panel Repair: Important Things Every Technician and Customer Should Know
iPhone 13 Back Glass Repair: Essential Tips for Technicians and Customers
The iPhone 13 back panel repair is one of the most common smartphone repair services today. Since the iPhone 13 features a premium glass back, it provides an elegant design, supports MagSafe accessories, and enables wireless charging. However, the glass can crack or shatter if the phone is accidentally dropped. Although a broken back panel may not immediately affect the phone’s performance, it should be repaired as soon as possible to prevent further damage and maintain the device’s appearance.
Repairing an iPhone 13 back panel is a delicate process that requires professional tools, technical expertise, and attention to detail. Whether you are a mobile repair technician or a customer looking for information before getting your phone repaired, understanding the repair process and the precautions involved can help you make the right decision.
1. Inspect the Device Before Starting
Before beginning any repair, carefully inspect the iPhone. Look for cracked camera lenses, frame dents, battery swelling, display damage, or signs of water exposure. If the frame is bent, simply replacing the back glass may not provide a perfect fit. It is also a good practice to document the phone’s condition with photos before the repair begins.
2. Use Professional Repair Tools
Professional tools are essential for safe and accurate repairs. Depending on the repair method, technicians may use a laser machine, controlled heating equipment, plastic pry tools, precision tweezers, adhesive removers, and specialized cleaning tools. Using low-quality tools increases the risk of damaging internal components and may result in poor repair quality.
3. Protect the Camera Module
The iPhone 13’s rear camera system is one of its most valuable components. During back glass removal, tiny glass fragments can scratch the camera lenses or enter the camera housing. Always protect the camera area before starting the repair. If the camera lens is already damaged, replacing it before installing the new back panel may be necessary.
4. Handle the Wireless Charging Coil with Care
Beneath the back glass is the wireless charging and MagSafe assembly. Excessive heat, aggressive scraping, or improper tool usage can damage the charging coil or magnetic ring. If this component is damaged, wireless charging or MagSafe accessories may stop functioning correctly. This is one of the most important areas to protect during the repair.
5. Control Heat Carefully
Heat is commonly used to soften the adhesive holding the back glass in place. However, too much heat can damage the battery, nearby flex cables, microphones, speakers, or wireless charging components. Apply only the amount of heat necessary to soften the adhesive while continuously monitoring the temperature.
6. Remove All Broken Glass Completely
After removing the damaged back panel, every piece of broken glass must be cleared from the frame. Even tiny fragments left behind can prevent the new back panel from sitting flat. Technicians should carefully inspect the frame before installing the replacement glass.
7. Clean the Frame Thoroughly
Old adhesive should be completely removed before installing the new panel. Any remaining adhesive can reduce bonding strength and create uneven gaps around the edges. Cleaning the frame properly ensures a professional finish and improves the durability of the repair.
8. Use High-Quality Replacement Parts
Not all replacement back panels offer the same quality. Premium or OEM-quality replacement glass usually provides better color matching, durability, and fit compared to low-cost alternatives. Inferior parts may crack more easily or develop cosmetic issues over time. Investing in quality replacement parts improves customer satisfaction and reduces repeat repairs.
9. Apply Premium Adhesive
The adhesive plays a crucial role in securing the new back panel. High-quality adhesive creates a stronger bond and provides a cleaner finish. It also minimizes the chance of the back panel becoming loose after prolonged use. Apply the adhesive evenly around the frame to avoid gaps and improper sealing.
10. Be Careful Around Flex Cables
Several delicate flex cables are located close to the repair area. Applying excessive force while removing broken glass may accidentally cut or damage these cables. Damaged flex cables can affect charging, audio, connectivity, or other phone functions, leading to more expensive repairs.
11. Test Every Function After Repair
Before returning the phone to the customer, perform a complete functional test. Check the following:
- Rear camera performance
- Camera focus
- Camera flash
- Wireless charging
- MagSafe compatibility
- Wi-Fi connectivity
- Bluetooth connection
- Mobile network signal
- Speaker and microphone
- Vibration motor
- Charging functionality
- Face ID (if the device was opened during repair)
Testing every function helps identify any issues before the customer leaves the store.
12. Explain Water Resistance
The iPhone 13 originally comes with factory water resistance. However, once the back panel has been replaced, the original factory seal cannot always be restored. Even when premium adhesive is used, technicians should never guarantee the same level of water resistance as a brand-new device. Customers should avoid exposing the repaired phone to water.
13. Offer a Repair Warranty
Providing a warranty builds customer confidence. A warranty should clearly explain what is covered, such as adhesive failure or installation defects, and what is not covered, including accidental drops, liquid damage, or physical impact after the repair.
14. Maintain a Clean Work Environment
Dust, fingerprints, and glass particles can affect repair quality. A clean workspace helps prevent contamination inside the phone and results in a more professional finish.
15. Educate the Customer
Many customers believe a cracked back panel is only a cosmetic issue. Explain that broken glass can allow dust and moisture to enter the phone, increasing the risk of internal damage over time. Timely repair helps protect the device and preserve its value.
Common Mistakes to Avoid
Technicians should avoid these common errors:
- Applying excessive heat
- Using poor-quality replacement glass
- Leaving broken glass inside the frame
- Damaging the wireless charging coil
- Forgetting to test phone functions
- Using low-quality adhesive
- Rushing the repair process
- Ignoring frame damage before installation
Avoiding these mistakes improves repair quality and customer satisfaction.